
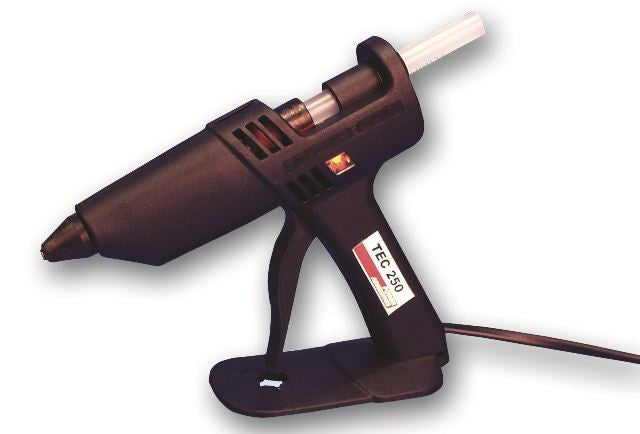
Equipment / Glue Guns
-
18mm - Heavy Duty Glue GunsRegular price From £177.32 GBPRegular priceUnit price per
-
12mm - Medium Duty Glue Gun NozzleRegular price From £14.18 GBPRegular priceUnit price per
-
12mm - Medium Duty Glue GunsRegular price From £97.79 GBPRegular priceUnit price per
-
220watt - M.D Glue GunsRegular price From £76.45 GBPRegular priceUnit price per
-
207 - 150 - Glue GunsRegular price From £103.10 GBPRegular priceUnit price per
-
206 - 120 - Glue GunsRegular price From £31.14 GBPRegular priceUnit price per


Equipment / Glue Guns
Equipment / Glue Guns
Hot melt glue guns are a practical way to apply thermoplastic adhesive quickly and consistently for packaging, light assembly, point-of-sale preparation, and general warehouse tasks. In a packing environment, they’re commonly used for carton and tray work, securing inserts, tacking protective materials in place, bundling components, and making fast repairs where tape or staples are not ideal. The key to reliable results is matching the glue gun’s stick diameter, melt output, and duty level to the job you’re doing.
This category includes handheld glue guns and a replacement nozzle option, covering both 12mm medium-duty and 18mm heavy-duty formats, plus wattage options that influence warm-up time and heat recovery during repeated use.
Glue Guns — Helpful Guide
When selecting a glue gun for packaging work, focus on four fundamentals: stick diameter (12mm vs 18mm), wattage (heat-up and recovery), application style (short beads vs longer continuous runs), and accessories (such as nozzles). The products in this collection fit into the following groups.
1) 18mm heavy-duty glue guns (high output for continuous work)
-
18mm - Heavy Duty Glue Guns
Designed for higher glue throughput using 18mm sticks. This format is typically chosen when you need longer beads, faster coverage, or frequent use where a smaller gun may struggle to keep up. It’s well suited to busy packing benches, repetitive carton work, and applications where consistent flow matters.
2) 12mm medium-duty glue guns (balanced handling and output)
-
12mm - Medium Duty Glue Guns
A versatile 12mm stick format that suits many packaging and light assembly tasks. Medium-duty guns are often preferred for controlled bead placement, intermittent use, and jobs where you want a lighter tool with good manoeuvrability.
-
206 - 120 - Glue Guns
A 120W class option for 12mm-style work where usage is typically intermittent. Lower wattage tools can be a good fit for short application cycles, smaller beads, and situations where the gun is used in bursts rather than continuously.
-
207 - 150 - Glue Guns
A 150W class option that generally offers stronger heat recovery than lower wattage models. This can help maintain more consistent flow when you’re applying glue repeatedly, moving between packs quickly, or working with slightly larger beads.
-
220watt - M.D Glue Guns
A higher wattage (220W) medium-duty option aimed at faster warm-up and improved temperature recovery during frequent use. Higher wattage is often chosen when you need steadier output across repeated applications, helping reduce pauses while the gun reheats.
3) Nozzles and application control
-
12mm - Medium Duty Glue Gun Nozzle
A replacement nozzle for 12mm medium-duty glue gun setups. Nozzles influence bead size and placement accuracy. Keeping a spare nozzle can help minimise downtime if a nozzle becomes worn, contaminated, or partially blocked by charred adhesive.
Case study: speeding up a packing bench without sacrificing consistency
A small fulfilment team was preparing mixed orders that required quick stabilisation of inserts and protective materials inside cartons. Tape worked for some packs, but for irregular shapes and small components it was slow and inconsistent. The team introduced a dedicated glue station with a medium-duty 12mm gun for precise tacking and a higher-output option for larger cartons.
By standardising where glue was applied (short beads at repeatable points) and ensuring the gun could maintain temperature during peak periods, they reduced rework caused by loose inserts and improved pack-to-pack consistency. The biggest operational improvement came from choosing a wattage level that matched the pace of work, so operators weren’t waiting for the tool to recover heat between cartons.
How to choose the correct glue gun for your application
Step 1: Choose the stick diameter (12mm vs 18mm)
12mm is a common choice for general packaging tasks where you need controlled application and moderate output. It’s often used for intermittent work, smaller beads, and jobs requiring better manoeuvrability.
18mm is typically selected when you need higher output, longer beads, or more continuous use. If your process involves repeated cartons, larger surfaces, or frequent adhesive application, the larger stick format can help maintain throughput.
Step 2: Match wattage to your duty cycle
Wattage affects how quickly the gun heats up and, more importantly for packaging lines, how well it recovers heat during repeated triggering. If the gun can’t recover heat fast enough, glue may become too viscous, bead size may vary, and bonding can become inconsistent.
- 120W class: Often suitable for intermittent use and smaller beads where you can pause between applications.
- 150W class: A stronger all-round option for frequent use, helping maintain steadier flow across repeated packs.
- 220W class: Typically chosen for faster warm-up and improved recovery when work is continuous or near-continuous.
Step 3: Consider bead size and placement
For packaging, the goal is usually a consistent bead that bonds quickly without excessive squeeze-out. A few practical tips:
- Use short beads for tacking inserts, corner points, or small components—this reduces mess and improves repeatability.
- Use longer beads when you need continuous contact along a seam or edge, but ensure the gun can maintain temperature during the run.
- Keep the nozzle clean to maintain predictable bead width and reduce stringing.
Step 4: Check ergonomics and workflow fit
In a warehouse or packing bench setting, comfort and control matter. Consider how the tool will be used across a shift:
- Trigger feel and control: smoother triggering helps consistent bead size.
- Stand stability: a stable resting position reduces accidental drips and improves safety.
- Warm-up and recovery: choose a wattage level that matches your peak pace, not just average use.
Best practices for reliable hot melt bonding in packaging
Surface preparation and compatibility
Hot melt adhesives bond best when surfaces are clean and dry. Dust, release agents, and moisture can reduce adhesion. For corrugated cartons, bonding is usually straightforward, but coated or glossy surfaces may require testing to confirm the adhesive wets out properly.
Temperature stability and bead quality
Inconsistent temperature can lead to thick, uneven beads or poor wetting. If you notice the glue becoming stringy or difficult to dispense during busy periods, it can be a sign the gun is not recovering heat quickly enough for your duty cycle. Moving to a higher wattage option can help maintain consistent flow.
Open time and set time
Hot melt adhesives cool and set quickly. In practice, this means you should align parts promptly after applying glue. If operators need more time to position components, consider applying smaller beads in multiple points rather than one long bead, or adjust the workflow so alignment happens immediately after dispensing.
Reducing stringing and mess
- Release the trigger slightly before lifting the nozzle away to reduce trailing strings.
- Keep the nozzle tip free of charred residue; a partially blocked nozzle can cause spurting.
- Use consistent trigger pressure and speed to maintain bead uniformity.
Maintenance and downtime prevention
For packing operations, small maintenance habits can prevent interruptions:
- Inspect nozzles regularly and replace if worn or blocked.
- Store the gun on its stand when not in use to reduce accidental contact and drips.
- Allow the tool to cool before storage and keep cords routed to avoid trip hazards.
Common packaging uses for glue guns
- Carton inserts and dividers: tacking inserts in place to prevent shifting in transit.
- Point-of-sale preparation: quick assembly of display trays and lightweight components.
- Bundling and kitting: securing small parts to backing cards or temporary fixtures.
- Protective material placement: holding foam, corrugated pads, or edge protection in position during packing.
- Warehouse repairs: fast fixes for torn corrugated, loose labels (where appropriate), or temporary holds.
Troubleshooting quick reference
- Glue bead is inconsistent or thin during busy periods: the gun may be cooling between triggers; consider a higher wattage option or slower application pace.
- Excessive stringing: adjust trigger release technique, clean the nozzle, and avoid lifting away too quickly.
- No glue flow: check stick diameter compatibility, confirm the gun is fully warmed, and inspect the nozzle for blockage.
- Poor adhesion: ensure surfaces are clean/dry and test on coated or dusty materials; confirm adequate bead size and immediate part alignment.
Frequently asked questions
What is the practical difference between 12mm and 18mm glue guns?
Stick diameter mainly affects glue output and how well the tool supports continuous work. 12mm guns are commonly used for controlled, medium-duty tasks and intermittent application. 18mm guns typically deliver higher throughput, which can help when applying longer beads or working continuously.
Does higher wattage always mean a better glue gun for packaging?
Not always. Higher wattage generally improves warm-up speed and heat recovery during repeated use, which can stabilise glue flow. However, if your work is intermittent and bead sizes are small, a lower wattage tool may be sufficient and easier to manage.
Why does my glue gun start well but struggle after several cartons?
This often happens when the gun cannot recover heat quickly enough for the pace of work. As temperature drops, glue becomes more viscous and output becomes inconsistent. Slowing the application rate, allowing brief recovery time, or using a higher wattage model can help.
When should I replace a glue gun nozzle?
Replace the nozzle if you see persistent blockage, spurting, uneven bead shape, or excessive charring that cannot be cleaned. A worn nozzle can reduce placement accuracy and increase stringing. Keeping a spare nozzle helps minimise downtime in busy packing areas.
How can I reduce stringing and mess when using hot melt glue?
Use steady trigger pressure, release the trigger slightly before lifting the nozzle away, and keep the nozzle tip clean. Stringing can increase if the nozzle is contaminated or if the glue is applied too quickly. Consistent technique usually improves bead control.