
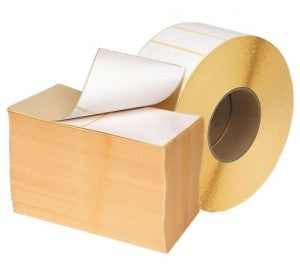
Branding / Labels / Self Adhesive Labels
-
 Sold out32x19 - Yellow Peel S/A LabelsRegular price From £4.97 GBPRegular priceUnit price per
 -
 Sold out32x19 - Red Peel S/A LabelsRegular price From £4.97 GBPRegular priceUnit price per
 -
 Sold out32x19 - Orange Peel S/A LabelsRegular price From £4.97 GBPRegular priceUnit price per
 -
 Sold out32x19 - Green Peel S/A LabelsRegular price From £4.97 GBPRegular priceUnit price per
 -
 Sold out32x19 - White Peel S/A LabelsRegular price From £3.43 GBPRegular priceUnit price per
 -
 Sold out22x16 - Yellow Peel S/A LabelsRegular price From £2.49 GBPRegular priceUnit price per
 -
 Sold out22x16 - Orange Peel S/A LabelsRegular price From £2.49 GBPRegular priceUnit price per
 -
 Sold out22x16 - White Peel S/A LabelsRegular price From £1.59 GBPRegular priceUnit price per
 -
 Sold out16x10 - White Peel S/A LabelsRegular price From £2.09 GBPRegular priceUnit price per
 -
 Sold out19mm - Clear Peelable S/A LabelsRegular price From £2.22 GBPRegular priceUnit price per
 -
 Sold out19mm - Clear Perm S/A LabelsRegular price From £3.98 GBPRegular priceUnit price per
 -
 Sold outDumbell LabelsRegular price From £6.05 GBPRegular priceUnit price per
 -
 Sold out50mm - White Round S/A LabelsRegular price From £7.43 GBPRegular priceUnit price per
 -
 Sold out25mm - Clear Round S/A LabelsRegular price From £2.49 GBPRegular priceUnit price per
 -
 Sold out20mm - White Round S/A LabelsRegular price From £2.49 GBPRegular priceUnit price per
 -
 Sold out75x50 - White Perm S/A LabelsRegular price From £9.87 GBPRegular priceUnit price per
 -
76x38 - White Perm S/A Labels Printed in BlackRegular price From £46.83 GBPRegular priceUnit price per
-
 Sold out89x37 - White Perm S/A LabelsRegular price From £3.77 GBPRegular priceUnit price per
 -
 Sold out43x24 - White Perm S/A LabelsRegular price From £5.40 GBPRegular priceUnit price per
 -
 Sold out12x30 - Clear Perm S/A LabelsRegular price From £6.94 GBPRegular priceUnit price per


Branding / Labels / Self Adhesive Labels
Self Adhesive Labels for Packaging, Stock Control & Identification
Self adhesive labels are a practical way to add clear identification to products, cartons, shelves, bags and components. They help teams keep items organised, communicate handling instructions, and maintain traceability through picking, packing and dispatch. This collection focuses on compact, easy-to-apply labels in a range of shapes, sizes and finishes, including coloured peel labels, clear labels, round labels and larger permanent labels.
Because labels are often applied at speed, the most important considerations are: label size (so it fits the available space), face material (paper vs clear film), adhesive type (peelable vs permanent), and the surface you are applying to (cardboard, plastic, glass, painted metal, etc.). The products in this category cover common day-to-day needs such as colour coding, small-item identification, and general purpose marking.
Self Adhesive Labels — Helpful Guide
Below is a practical guide to the label types in this category and when to use them. Where relevant, product names are linked so you can quickly check the exact size and format.
1) Coloured peel labels (quick colour coding)
Peel labels are commonly used for fast visual identification. The coloured face makes them easy to spot on cartons, bags, paperwork or product packaging. They are often chosen for batch separation, priority marking, internal routing, or simple “at a glance” sorting.
- 32x19 - Yellow Peel S/A Labels — compact rectangular labels suited to colour coding on small packs, cartons and documents.
- 32x19 - Red Peel S/A Labels — a strong visual marker for urgent, quarantine, returns or internal workflow flags.
- 32x19 - Orange Peel S/A Labels — useful for highlighting exceptions, checks, or temporary status changes.
- 32x19 - Green Peel S/A Labels — often used for “checked/approved” style identification or completed steps.
- 32x19 - White Peel S/A Labels — a neutral option for handwritten notes, codes or short identifiers.
- 22x16 - Yellow Peel S/A Labels — smaller footprint for tight spaces such as small cartons, sleeves or component bags.
- 22x16 - Orange Peel S/A Labels — compact colour coding where label real estate is limited.
- 22x16 - White Peel S/A Labels — small white labels for short handwritten references or internal codes.
- 16x10 - White Peel S/A Labels — very small labels for tiny packs, parts bins, or minimal marking.
Tip: When colour coding, define a simple internal legend (e.g., red = hold, green = checked, yellow = priority) and keep it consistent across departments. Consistency reduces errors more than adding extra text.
2) Clear labels (discreet marking on packaging)
Clear labels are chosen when you want the label to be less visually intrusive, or when you need to see the surface underneath (for example, on printed packaging, branded cartons, or clear containers). In this collection you’ll find clear labels with different adhesive behaviours.
- 19mm - Clear Peelable S/A Labels — small round clear labels designed for applications where you may want to remove the label later with minimal disruption.
- 19mm - Clear Perm S/A Labels — small round clear labels intended for longer-lasting adhesion where removal is not the priority.
- 25mm - Clear Round S/A Labels — a slightly larger clear round label for improved visibility while remaining discreet.
- 12x30 - Clear Perm S/A Labels — a narrow rectangular clear label format that suits slim spaces and tidy presentation.
Tip: Clear labels can be harder to see during application. If you apply labels quickly, consider using a consistent placement rule (e.g., top-right corner) so operators can apply and check placement reliably.
3) White round labels (general marking and identification)
Round labels are widely used for sealing, marking, and simple identification. White rounds are easy to write on and stand out clearly on most packaging surfaces.
- 20mm - White Round S/A Labels — small round labels for quick marks, dots, or short handwritten codes.
- 50mm - White Round S/A Labels — larger round labels for more prominent marking or where you need more writing space.
4) Larger permanent labels (addressing, carton marking, and longer-life identification)
When you need a label that stays put through handling, storage, or transport, a permanent adhesive label is typically preferred. Larger formats also provide more space for printed information, barcodes, or longer handwritten notes.
- 75x50 - White Perm S/A Labels — a larger rectangular label suitable for carton identification, location labels, or general purpose marking.
- 89x37 - White Perm S/A Labels — a wide format label that can suit longer references, codes or printed identifiers.
- 76x38 - White Perm S/A Labels Printed in Black — a pre-printed option where a consistent message is required without handwriting.
- 43x24 - White Perm S/A Labels — a mid-size label balancing readability with efficient use of space.
5) Specialty shapes (secure hold on awkward items)
Some items are difficult to label with a standard rectangle or circle. Specialty shapes can help the label wrap around or anchor more securely.
- Dumbell Labels — a shaped label format often used where the label needs to grip around a narrow section or provide a more secure hold than a simple rectangle.
Case Study: Reducing Picking Errors with Simple Label Standards
A small warehouse team handling mixed SKUs often struggles with mis-picks when products look similar or when multiple orders are processed at once. A straightforward improvement is to introduce a consistent label standard that supports visual checks without adding complexity.
Scenario: A team processes daily orders containing similar-looking items packed into plain cartons. Operators need a quick way to separate “ready to dispatch”, “needs check”, and “hold” cartons while keeping the packing bench tidy.
Approach:
- Use a single label placement rule (e.g., top-right corner of the carton face).
- Assign colours to statuses (e.g., green = checked, red = hold, yellow = priority).
- For cartons that must remain labelled through transport, switch to a larger permanent label such as 75x50 - White Perm S/A Labels for the final dispatch identifier.
Result: The team gains a fast visual workflow that reduces handling mistakes and makes it easier for supervisors to audit progress at a glance. The key is not the number of label types, but consistent rules for colour meaning and placement.
How to Choose the Correct Self Adhesive Label
Step 1: Confirm the surface and environment
Start by identifying what you are labelling: corrugated cardboard, smooth plastic, glass, painted metal, or a textured surface. Smooth, clean surfaces generally accept labels more reliably. Dust, oil, condensation and rough textures reduce adhesion and can cause lifting at the edges.
Practical checks: Wipe the surface, apply one label, and leave it for a short period. If edges lift, consider a larger label area, a permanent adhesive option, or a different placement area with less texture.
Step 2: Decide between peelable and permanent adhesive
Peelable labels are useful for temporary identification, short-term sorting, or situations where you may need to remove the label later. Permanent labels are better when the label must remain in place through handling, storage, or shipping.
- Temporary status marking: consider peel labels such as 32x19 - Yellow Peel S/A Labels or 22x16 - White Peel S/A Labels.
- Longer-life carton identification: consider permanent labels such as 75x50 - White Perm S/A Labels or 43x24 - White Perm S/A Labels.
- Discreet marking with stronger hold: consider 19mm - Clear Perm S/A Labels or 12x30 - Clear Perm S/A Labels.
Step 3: Choose the right size and shape
Label size should match both the available space and the amount of information you need to show. Small labels are ideal for dots, short codes, or colour flags. Larger labels are better for longer references, printed text, or barcodes.
- Very small spaces: 16x10 - White Peel S/A Labels.
- Compact colour coding: 22x16 - Yellow Peel S/A Labels or 32x19 - Yellow Peel S/A Labels.
- Round marking/sealing: 20mm - White Round S/A Labels, 25mm - Clear Round S/A Labels, or 50mm - White Round S/A Labels.
- More information space: 75x50 - White Perm S/A Labels or 89x37 - White Perm S/A Labels.
Step 4: Plan for application speed and consistency
In busy packing areas, the best label is the one that can be applied consistently. Standardise placement, keep label rolls accessible, and avoid switching between too many sizes unless there is a clear operational reason. If handwriting is required, ensure the label face is suitable for your pen/marker and allow ink to dry before stacking.
Application Tips (to Improve Adhesion and Readability)
- Apply to clean, dry surfaces: dust and moisture are common causes of label failure.
- Use firm pressure: press across the whole label, especially edges and corners.
- Avoid touching the adhesive: oils from fingers can reduce tack on small labels.
- Allow time to bond: adhesives typically build strength after application; avoid immediate abrasion where possible.
- Choose contrast wisely: coloured labels are excellent for quick sorting; white labels are better for handwriting; clear labels keep packaging design visible.
Common Uses for Self Adhesive Labels
- Warehouse location and bin marking: small white labels for short codes; larger permanent labels for aisle/bin identifiers.
- Batch and date identification: colour peel labels for quick separation of lots or production runs.
- Quality control status: green/red/yellow labels to indicate inspection stages.
- Packaging presentation: clear labels for discreet sealing or marking without covering printed artwork.
- Returns and rework: bright colours to flag items needing attention.
Questions & Answers
What is the difference between peelable and permanent self adhesive labels?
Peelable labels are designed for temporary identification and are typically easier to remove when the label is no longer needed. Permanent labels are intended to stay in place for longer, resisting handling and storage conditions where removal is not expected.
How do I choose the right label size for my packaging?
Start with the available flat area and the amount of information you need to show. Small labels suit dots, short codes, or colour flags, while larger labels suit longer references or printed text. Test placement to avoid seams, folds, or textured areas.
Do clear labels work well on printed cartons and branded packaging?
Clear labels are often chosen to keep printed designs visible while still adding identification or sealing. For best results, apply to a smooth, clean area and use consistent placement. If readability is critical, consider a white label for higher contrast.
Why do labels sometimes lift at the corners after application?
Corner lift is commonly caused by dust, moisture, rough surfaces, or applying labels over curves and edges. Insufficient pressure during application can also contribute. Try cleaning the surface, applying to a flatter area, or using a larger label to increase contact area.
What are round self adhesive labels typically used for?
Round labels are widely used for simple marking, sealing, and quick identification. Their shape reduces snagging and can look neat on packaging. Smaller rounds suit dot marking and short codes, while larger rounds provide more space for handwriting or prominent visibility.