
Line Marking - Hazard Tape
Red Line Marking Tape — Overview
Red line marking tape is a fast, clean way to create clear visual guidance on floors and other smooth surfaces. Whether you’re organising pedestrian routes, defining work zones, highlighting hazards, or improving workflow in a warehouse, workshop, or production area, this tape provides an immediate, high-visibility line without the downtime and mess associated with paint.
This product is supplied as a roll of red line marking / hazard marking tape. It is designed for straightforward application: measure, cut, apply, and press down firmly for a neat, professional finish. Because it’s a tape solution, it’s also easier to update than permanent markings—ideal for environments where layouts change, temporary projects are common, or continuous improvement initiatives require frequent reconfiguration.
Key Features
High-visibility red marking
Creates a strong visual line that stands out on most floor colours, helping teams quickly recognise boundaries, routes, and designated areas.
Quick application with minimal disruption
Apply directly to a clean, dry surface—no drying time like paint, so areas can often be returned to service sooner (subject to site conditions and adhesion checks).
Neat, consistent lines
Helps produce straight, uniform markings for a tidy, professional appearance across aisles, bays, and workstations.
Flexible for changing layouts
Tape-based marking is well suited to facilities that regularly adjust storage locations, production cells, or pedestrian routing.
Suitable for safety and organisational marking
Commonly used for hazard awareness, segregation of areas, and general visual management in industrial and commercial settings.
Key Features (Bullet Summary)
- Red line marking / hazard marking tape for clear visual guidance
- Fast to apply compared with painted lines
- Helps create consistent, professional-looking markings
- Useful for zoning, routing, and general workplace organisation
- Ideal where layouts may need to change over time
Typical Uses
- Marking pedestrian walkways and safe routes
- Defining storage bays, pallet locations, and staging areas
- Highlighting restricted zones or keep-clear areas
- Organising workstations, production cells, and inspection points
- Temporary or semi-permanent marking for projects and events
Red Line Marking Tape — Full Product Guide
Introduction
Clear floor marking is a cornerstone of effective visual management. A well-marked site can reduce confusion, support safer movement, and improve efficiency by making it obvious where people and equipment should (and should not) go. Red line marking tape is a practical option when you need a bold, easy-to-understand line that can be installed quickly and updated as your space evolves.
How It Works
Line marking tape uses a pressure-sensitive adhesive backing to bond to the surface. Once positioned, the tape is pressed down firmly to ensure full contact, especially along the edges. The result is a crisp, continuous line that can be used on its own or as part of a wider colour-coded marking system.
For best results, the surface should be clean and dry before application. Dust, oil, moisture, and loose debris can reduce adhesion and shorten service life. In busy environments, taking a little extra time on preparation can make a noticeable difference to durability.
Materials and Construction
This product is a specialist line marking / hazard tape supplied on a roll. Like most floor marking tapes, it is designed to be flexible enough to conform to smooth surfaces while maintaining a consistent appearance once applied. The adhesive layer is intended to hold the tape in place under typical workplace conditions when applied correctly.
If you are comparing options, consider the environment (traffic levels, cleaning routines, and surface condition) and choose a tape type that matches your operational needs. Where heavy traffic is expected, careful surface preparation and firm application pressure are especially important.
Floor Type Compatibility
Line marking tapes are generally best suited to smooth, sealed surfaces where the adhesive can make full contact. Typical examples include sealed concrete, epoxy-coated floors, and other smooth industrial floor finishes.
- Best on: clean, smooth, sealed surfaces
- Use caution on: rough, dusty, porous, or uneven floors (adhesion may be reduced)
- Before full rollout: test a short length in a representative area to confirm performance
If your floor has texture, contamination, or frequent moisture, you may need additional preparation steps or an alternative marking method. A small test patch is a simple way to validate suitability before marking large areas.
Health and Safety
Floor marking supports safer workplaces by improving visibility and helping separate people, vehicles, and processes. When planning your markings, consider:
- Keeping routes clear and consistent across the site
- Using colour coding that your team understands (and documenting what each colour means)
- Ensuring markings do not create trip hazards—press edges down firmly and replace damaged sections promptly
- Checking that markings remain visible under your lighting conditions
Always follow your site’s safety policies and any relevant guidance for workplace traffic management and visual communication.
Ideal Applications and Use Cases
Red line marking tape is commonly used anywhere you need a clear boundary or attention-grabbing line. Examples include:
- Warehousing: aisle edges, pick faces, staging lanes, and pallet positions
- Manufacturing: work cell boundaries, inspection zones, and material flow lanes
- Workshops: tool areas, safe standing zones, and equipment keep-clear spaces
- Facilities management: temporary reroutes during maintenance or refurbishment
- Events and logistics: short-term zoning and directional guidance
Because tape can be applied quickly, it’s also useful for trial layouts—mark a proposed change, run it for a period, then adjust based on feedback.
Maintenance, Cleaning and Care
To keep markings looking sharp and performing well:
- Clean the floor regularly to prevent dirt build-up along tape edges
- Avoid aggressive scraping tools that could lift or damage the tape
- Inspect high-traffic areas and replace worn sections as needed
- When cleaning, ensure the tape edges remain firmly bonded—re-press if required
In areas with frequent forklift turns or heavy abrasion, consider reinforcing your marking plan with protective measures (such as layout changes that reduce tight turning over the line) and schedule more frequent inspections.
Case Study (Example Workflow Improvement)
A typical warehouse challenge is congestion around goods-in and dispatch. By introducing clear red boundary lines for staging lanes and keep-clear zones, teams can reduce confusion about where pallets should be placed and maintain access to doors, fire points, and equipment. The result is often smoother movement, fewer blocked areas, and faster handovers between shifts.
This tape-based approach is particularly helpful when the operation is evolving—lines can be adjusted as volumes change, new racking is installed, or processes are refined.
Who Is It For?
- Warehouse and logistics managers implementing visual management
- Health & safety teams improving route clarity and zoning
- Facilities teams needing quick, tidy marking without paint
- Manufacturing supervisors organising work cells and material flow
- Any site that benefits from clear, consistent floor communication
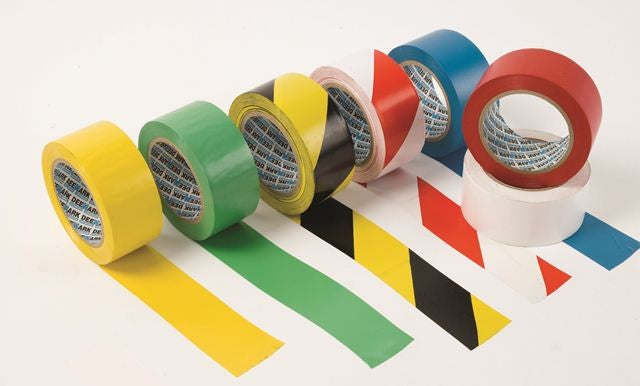
Colours / Features Available
This listing is for red line marking tape. If you are building a colour-coded system, you may wish to use additional colours for different meanings (for example, separating pedestrian routes from equipment zones). Choose colours that align with your internal standards and ensure they are communicated clearly to staff.
Sizes Available
This product is supplied as a roll of line marking tape. If this product page offers multiple options (such as different pack quantities or related variants), select the option that best matches your site’s marking plan and the total length of lines you need to create.
Tip: When estimating quantity, include allowances for overlaps at joins, rework during installation, and future touch-ups in high-traffic areas.
Installation Tips (Best Practice)
- Plan first: mark out the route with a chalk line or temporary guide to keep lines straight
- Prepare the surface: remove dust and residues; allow the floor to dry fully
- Apply with pressure: press down firmly along the full length, focusing on edges
- Allow to settle: where possible, avoid immediate heavy traffic until adhesion is confirmed
- Test in situ: trial a short section in a representative area before full installation
If you need help choosing the right marking approach for your environment, consider traffic levels, cleaning methods, and floor condition—these factors typically have the biggest impact on service life.